Migrating from INKY Legacy to Kaseya Platform
Step-by-step guide for existing INKY customers transitioning to Kaseya INKY products (Pro, Advanced, or K365 User).
Written By Matt Sywulak
Last updated 2 days ago
Overview
This guide outlines the migration process for existing INKY customers transitioning to Kaseya platform products. Your current dashboard access and data will remain intact throughout the migration. However, some adjustments to licenses, configuration, and tenant installation may be required.
Before You Begin
Contact your Account Manager to initiate the migration request. INKY backend administrators will be notified and will assign updated licenses along with Kaseya product offers to your MSP team. You will be notified when you can begin switching teams to the new products.
Migration Steps
Step 1: Update Product Offers for Each Tenant
For each tenant (your MSP tenant and each end-customer tenant):
Navigate to the Admin Center Summary page
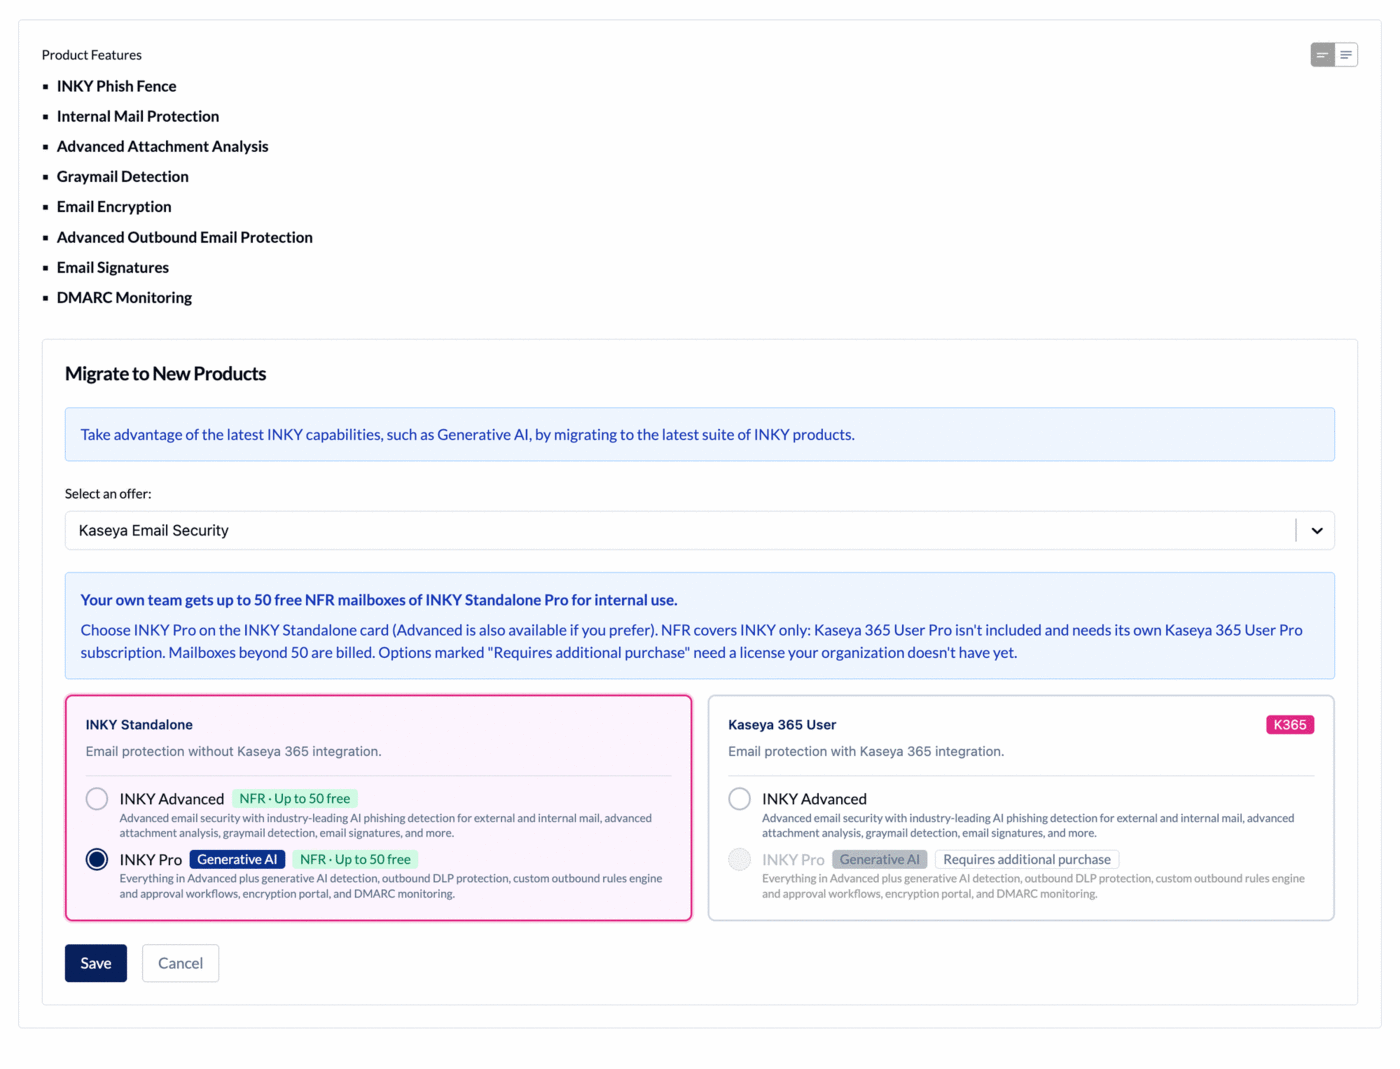
In the Migrate to New Products section, select the new Kaseya offer. On a team already on the new products, the section is called Modify Products.
Choose a product on the INKY Standalone or Kaseya 365 User card, then click Save
This will update the customer's product, product features, and entitlements.
An option tagged Requires additional purchase needs a license your organization doesn't have yet. Contact your Account Manager to add it.
On your MSP tenant, a note above the cards explains your free NFR allowance of up to 50 INKY Standalone Pro mailboxes. See NFR Licenses for Partners.
Step 2: Verify Team Setup Configuration
On the Team Setup page, confirm the following:
Team License — Verify the license status shows as redeemed
API Access — Confirm all requested API permissions are granted
M365 Installation — If your Microsoft 365 installation is more than 6 months old, perform an Uninstall followed by a new Install to ensure optimal configuration
Step 3: Configure BullPhish ID Integration (K365 User Only)
If your organization is moving to K365 User, you will need to configure the BullPhish ID integration at this time. See Configure BullPhish ID Integration for detailed instructions.
Need Help?
If you encounter any issues during the migration process, contact your Account Manager or reach out to INKY Support.
Still need help? Ask the team