User-Level Allow and Block Lists
Users can create personal Allow and Block List entries that apply only to their mailbox. Admins can also create and manage user-specific entries.
Written By Matt Sywulak
Last updated 9 months ago
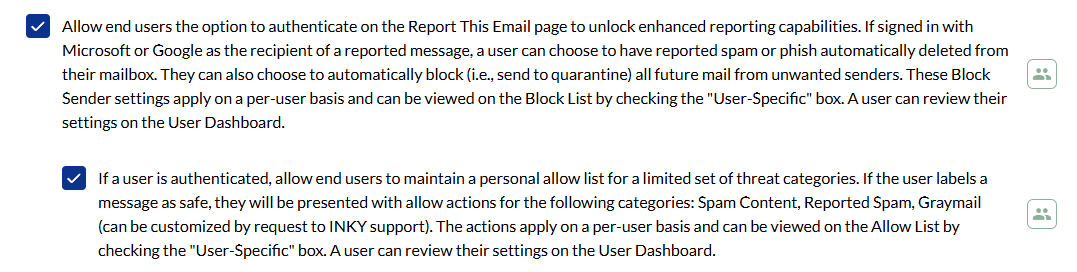
Available in: Both bundles (requires user authentication enabled)
End-User Creation
Prerequisites: User authentication must be enabled in INKY settings found User Reporting - INKY
Process:
Find bannered email
Select "Report This Email" link (far right under banner) or use the Quick Action Reporting Links - INKY (Safe, Spam, Phish)
Sign in if prompted (not necessary if using “Automatically treat the user as authenticated when clicking a quick-action link in a single-recipient message)

Select Spam or Phishing as reporting type (not necessary when using Quick Links)
Choose block options: (not necessary when using Quick Links)
Sending address
Sending domain
Both
Admin Management
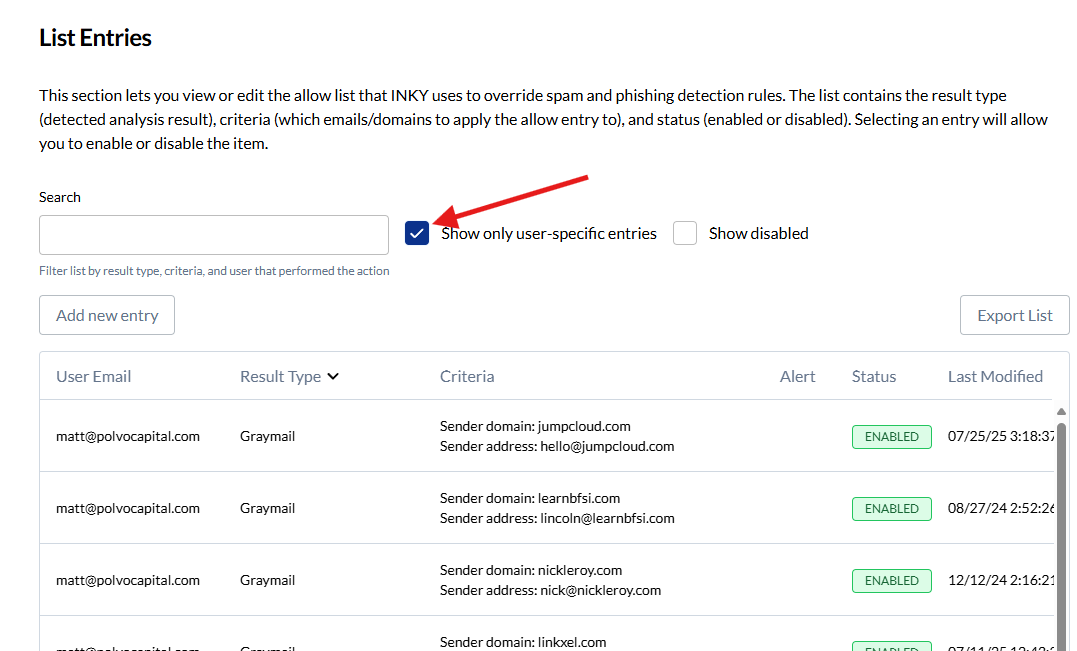
View user entries:
Admin Center > Allow List or Block List
Enable "Show only user-specific entries"
Add user entry:
Select Add New Entry
Use "For use with email address" field to specify user
Complete entry as normal
Edit user entry: Follow normal edit process, change "User's Email address" field if needed
Organization-Level vs Team-Level vs User-Level
Organization-level entries:
Apply to all child-teams for a given organization
Managed by organization-level admins only
Visible when an organization is selected in the team selector
Team-level entries:
Apply to all users in tenant
Managed by admins only
Visible in standard list view
User-level entries:
Apply to specific user only
Created by users or admins
Visible only with "user-specific" filter enabled
Use user entries when: Individual users need exceptions to team policy or have unique trusted contacts.