Microsoft 365
Installation of an M365 is an incredibly streamlined process now using our Team Setup process. After you created the License from the previous step here you can begin the install process following the steps below.
Written By Matt Sywulak
Last updated 3 months ago
Redeem the License
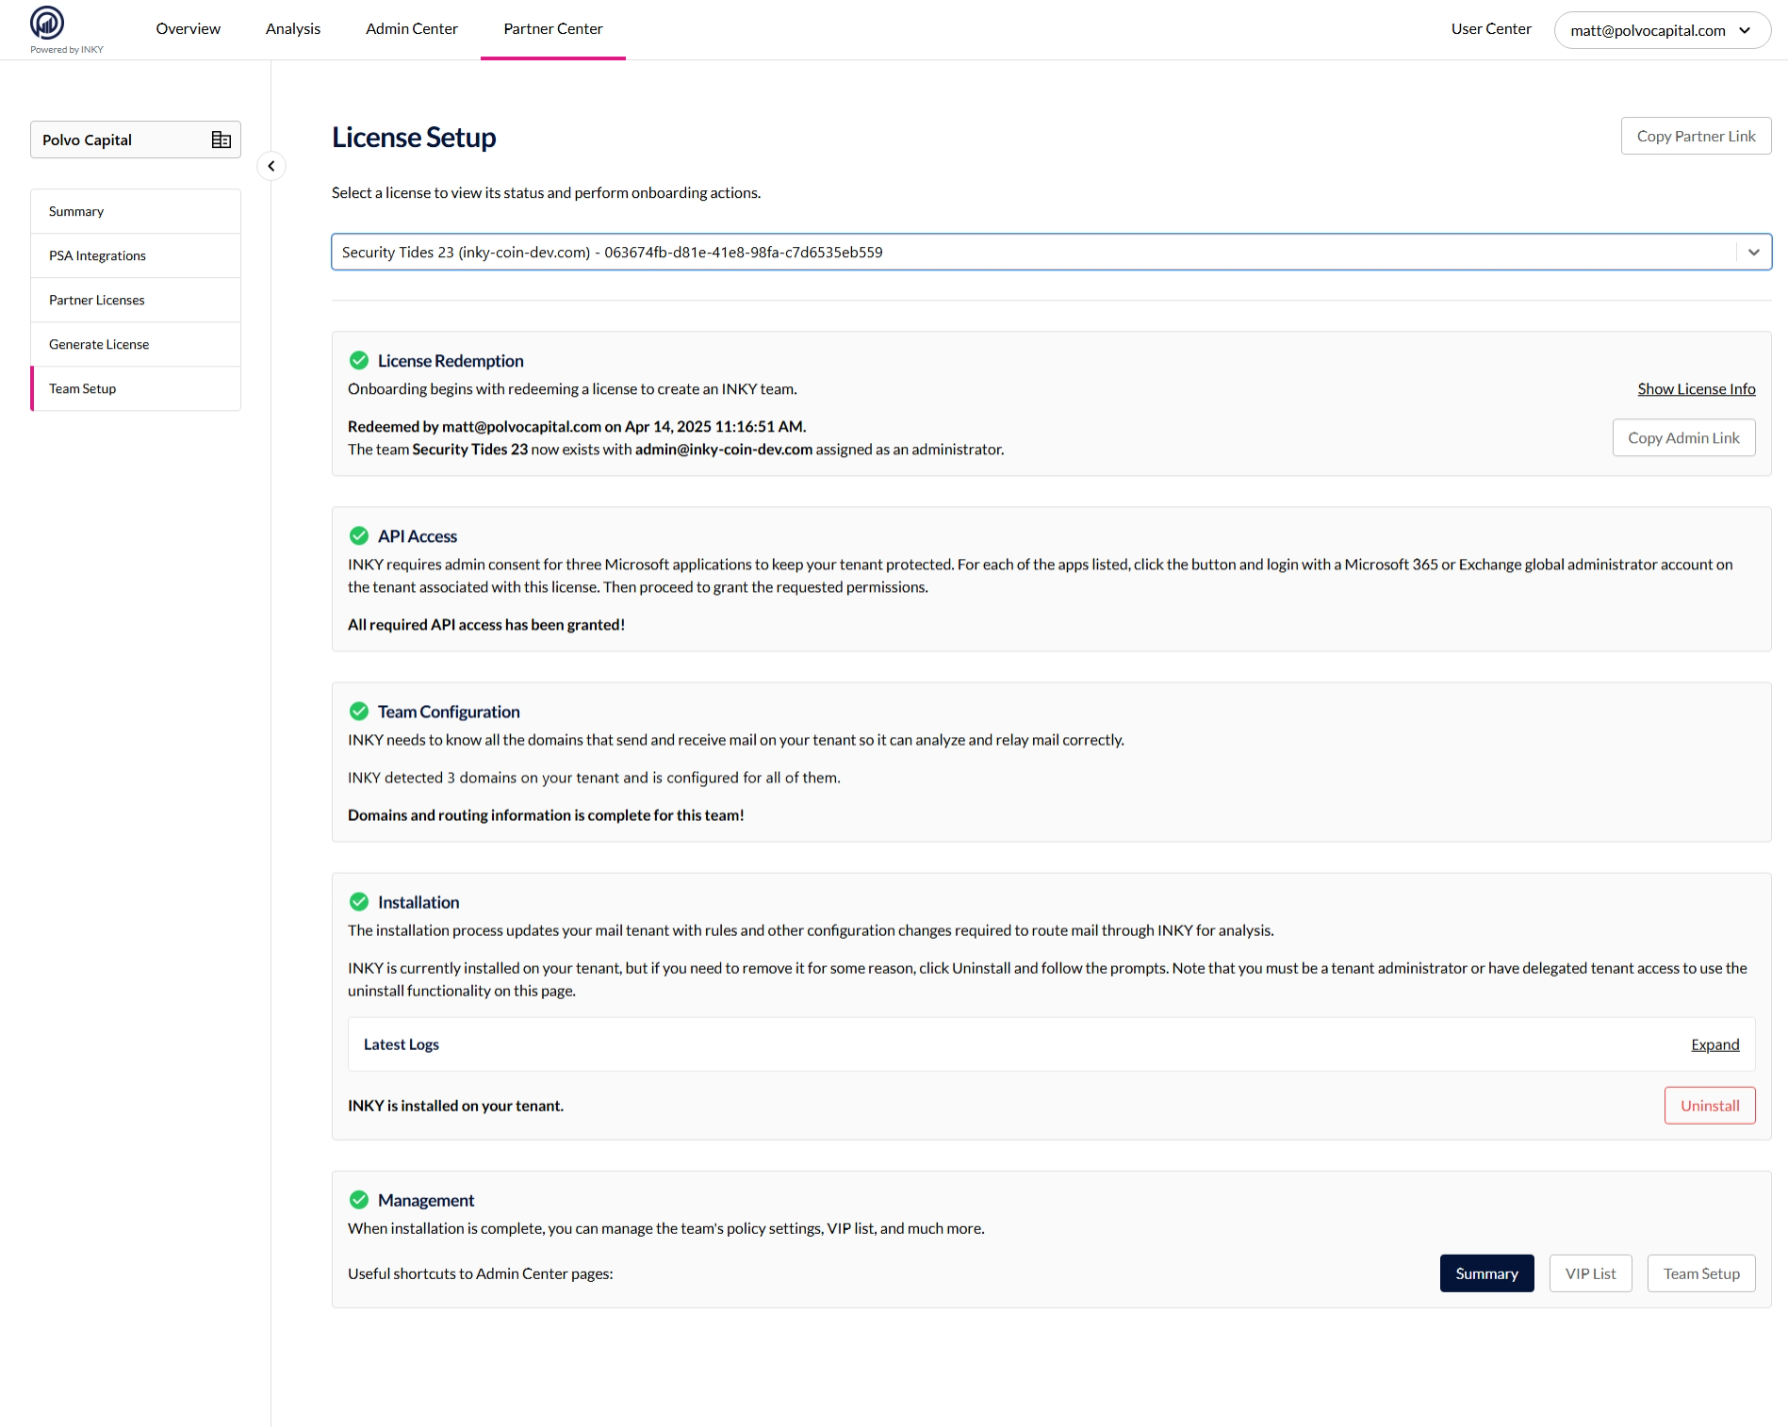
You can utilize the direct link from the generation page to get to Team Setup - INKY or you can navigate directly there. Using the dropdown, you can select the appropriate license you want to redeem and install.

Along the way each section will show a Green Checkmark showing that it is complete or if you need to back out of a step you could click the Reset.
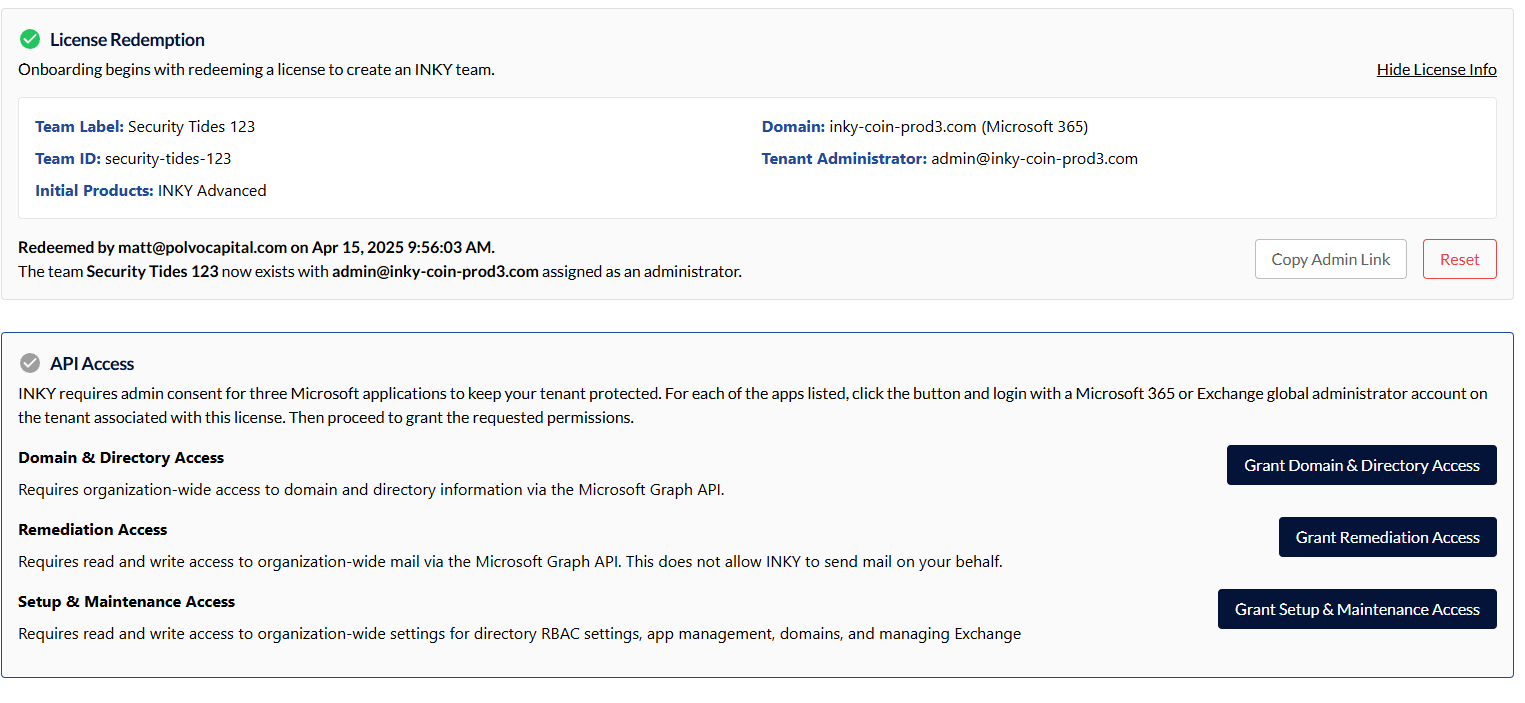
Confirm API Access
Next, you'll need to confirm the API access for the team. You'll need to confirm the following:
Domain and Directory Access
Remediation Access
Setup & Maintenance Access
You'll use the M365 global admin account for the end customers tenant you're install. After each step it'll return you to this page where the access is highlighted green showing that you can move to the next one.
After each API grant there may a be slight delay where the button is in a "Pending" state. After a short amount of time, it will update to the green "Granted" state you see in the second picture below.

Team Configuration
The team is initially configured with the information provided at the license generation step. INKY needs to know all the domains that send and receive mail on your tenant so it can analyze and relay mail correctly. To fully protect all domains on a tenant you'll need to hit the "Update Team" option next.

Installation
The installation process updates your mail tenant with rules and other configuration changes required to route mail through INKY for analysis.
Install Settings
There are three settings you can configure during the installation process.
Delegate access for this tenant to the managing partner team.This allows partner super admins to view mail content and perform other tenant actions after installation.
Automatically add all users to the group whose mail is processed by INKY.
Activation Delay: You don't need to have any delay if you don't want and can set both values to 0 but if you want to delay the processing start time you can here.
Once ready to install select "Install" and you'll now see an update log list with new events show the install processing.
The logs will pause after a bit of non-interactivity. If you want to continue to watch the log just select the "Click here to resume checking for updates"
Completed Install
Once completed you'll see the green checks on all steps and links to the Summary, Vip List, or Team Setup for the specific team you created. You can also access the latest logs by expanding the log section.
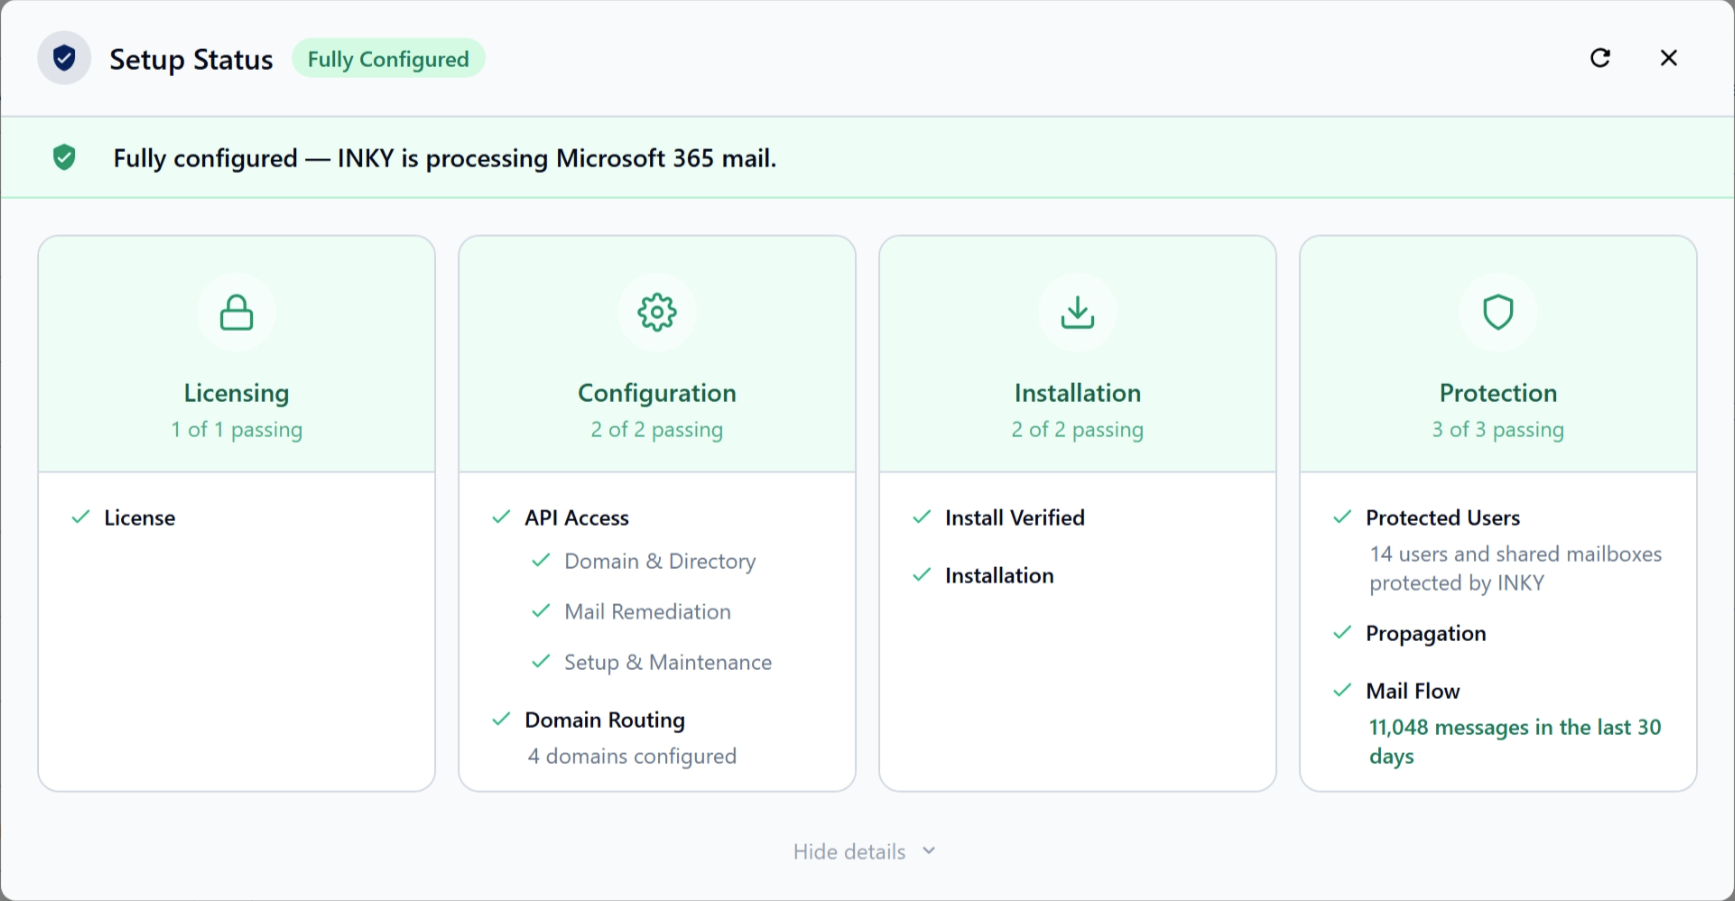
Setup Status on the Summary Page
After the install completes, navigating to the team's Summary page will show the Setup Status widget. This is a 4-phase card grid that tracks whether email routing is fully configured end-to-end—it's separate from the green checkmarks you saw during the install steps above.
The install checklist confirms that INKY's setup wizard ran successfully. Setup Status on the Summary page goes further—it actively verifies that mail is flowing correctly through each phase of the routing pipeline after install.
The widget automatically refreshes on a countdown timer, so you don't need to reload the page while waiting for DNS or mail flow changes to propagate. Once all four phases are confirmed, polling stops on its own.
Each phase card is expandable for additional detail.
Failing phases expand automatically to surface the problem.
Action links are provided within failing phases to assist with remediation.
The protected user count reflects a dynamic mail window and updates as mail flows through the pipeline.
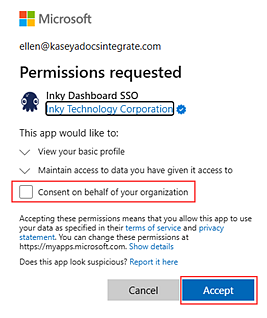
Important: Log into INKY from this tenant and in the Microsoft Permissions requested dialog box, select Consent on behalf of your organization and click Accept.
/