Allow List Overview
Allow List entries suppress specific INKY warnings for trusted senders. Use this when legitimate emails are incorrectly flagged.
Written By Matt Sywulak
Last updated 7 months ago
Available in: Both bundles
Adding Allow List Entries
Manual Entry
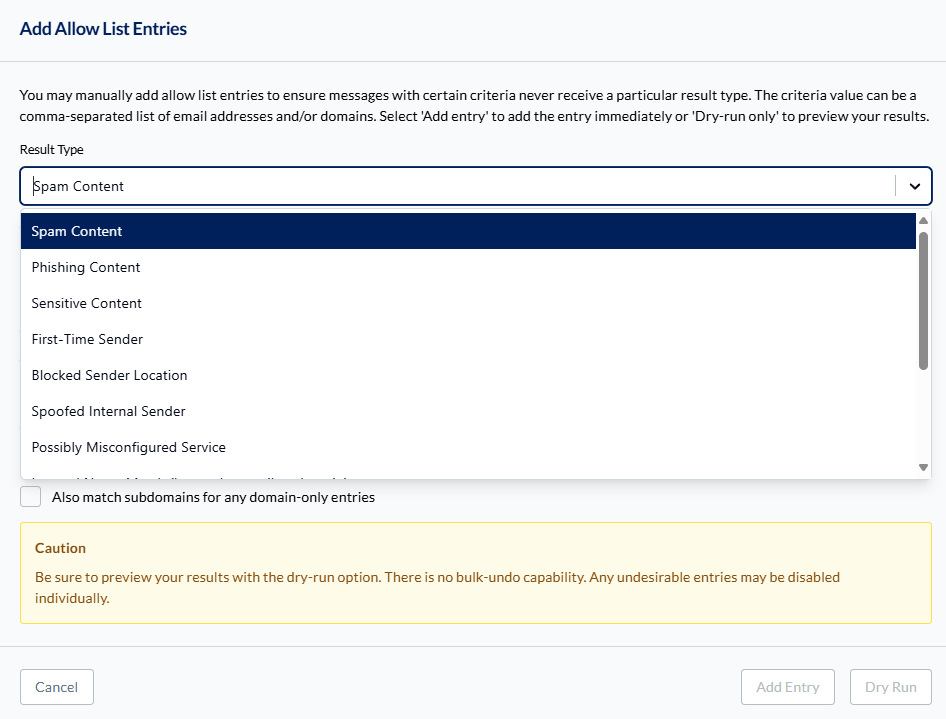
Admin Center > Allow List > Add New Entry Allow List - INKY
Select the result type to suppress (Spam Content, Phishing Content, First-Time Sender, etc.)
Enter email addresses or domains (comma-separated for multiple)
Optional: Enable Dry Run to preview
Select Add Entry
From a Message
Navigate to the message in Observations or Custom Dashboard
Filter by recipient, date, or subject to find the email
Select the appropriate Allow List action
Choose the most specific criteria (email address vs. domain)
Best practice: Use the most specific criteria possible. Allow a single email address rather than an entire domain when appropriate.
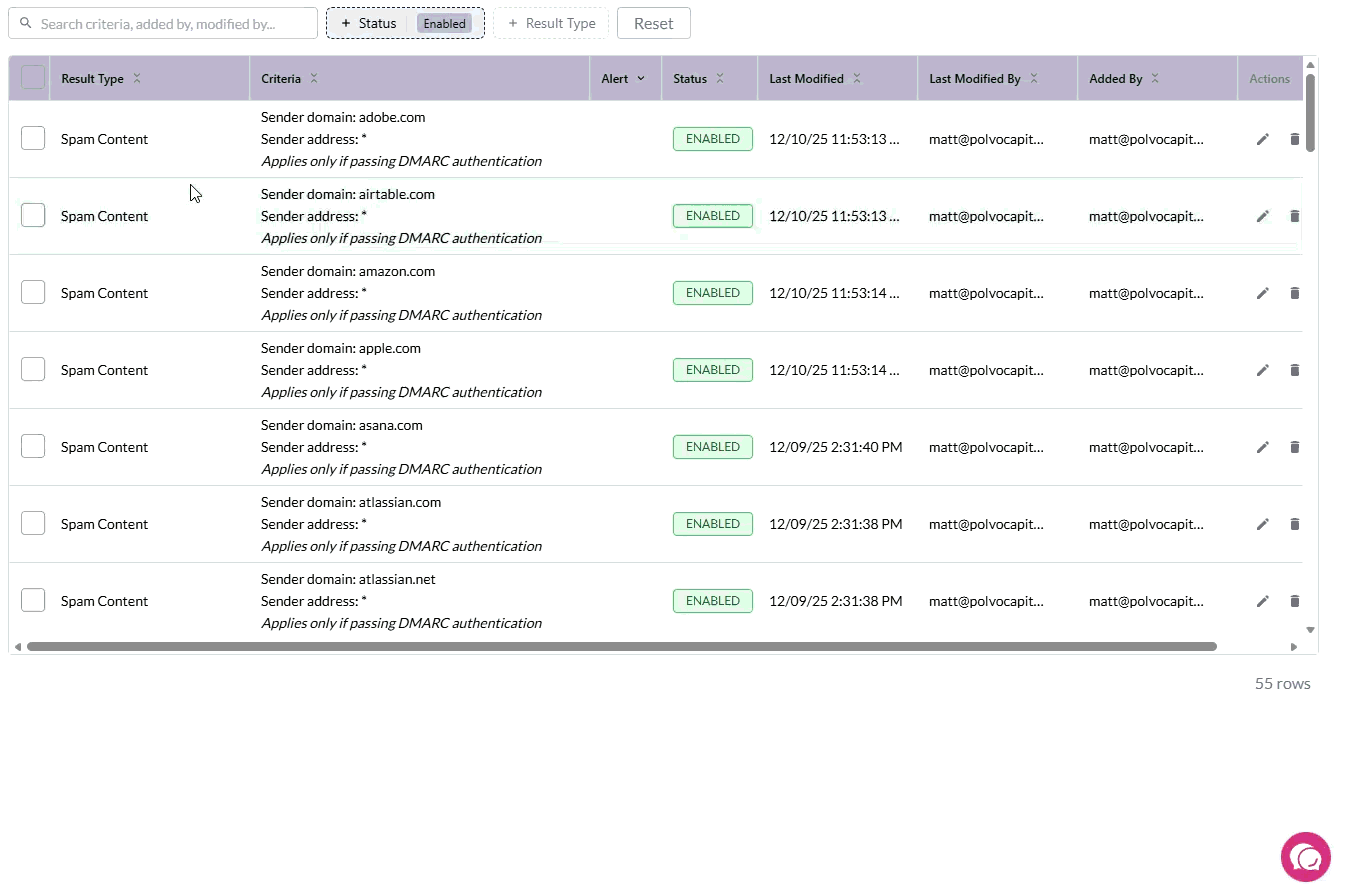
Managing Entries
The Allow List uses a modern table interface with powerful filtering and bulk operations.
Finding Entries
Use the filter options at the top of the list to narrow down entries:
Status filter — Show only Enabled or Disabled entries
Result Type filter — Filter by the type of warning being suppressed (Spam, Phishing, First-Time Sender, etc.)
User Email filter — Find entries that apply to specific users
Bulk Operations
Select multiple entries to perform bulk actions:
Check the boxes next to entries you want to modify (or use "Select All")
Choose Enable Selected or Disable Selected from the actions menu
A progress indicator shows the operation status
Tip: The system automatically skips entries already in the desired state, making bulk operations faster when managing large lists.
Individual Entry Management
Disable entry: Select entry > Disable Selected Entry
View details: Select entry > More Info
Delete entry: Select entry > More Info > Delete
Available Result Types
Suppress warnings for:
Spam Content
Phishing Content
Sensitive Content
First-Time Sender
Blocked Sender Location
Spoofed Internal Sender
Possibly Misconfigured Service
Internal Name Match (by sender email or domain)
Internal Name Match (by exact, case sensitive display name)
QR Code
Graymail
Any Threats (use sparingly)
From message view: Additional options appear based on what INKY detected (e.g., Brand Impersonation with brand-specific choices).
Authentication tip: Use DMARC-authenticated entries for safer allow listing.
Authentication Options
Authentication options make Allow and Block List entries safer by requiring DMARC validation before matching. This prevents attackers from spoofing allowed domains.
DMARC Authentication
What it does: Only matches entries if the sender passes DMARC (SPF or DKIM validates for the FROM header).
Why use it: Prevents spoofed emails from matching your allow list. If someone spoofs trusted-partner.com, the entry won't apply unless they also spoof the authentication records.
When adding entries:
From message view: Pre-checked as "(safer option)"
From bulk add: Available as checkbox
Recommendation: Always enable for Allow List entries unless you specifically need to allow unauthenticated mail.
Subdomain Matching
What it does: Extends domain-only entries to include all subdomains.
Example: Entry for company.com also matches:
mail.company.comsupport.company.com*.company.com
Available: Bulk add interface only (Admin Center > Allow List or Block List)
When to use: Organizations with multiple sending subdomains for the same service.
Applying Both Options
Safest configuration:
Enable DMARC authentication
Use specific email addresses rather than domains when possible
Enable subdomain matching only when necessary
Example safe entry:
Criteria:
notifications.company.comDMARC: Enabled
Subdomain matching: Disabled
Result type: First-Time Sender
This allows only authenticated mail from that specific subdomain.