Getting Started with Email Signatures
This guide walks you through creating your first email signature in just 10 minutes.
Written By Matt Sywulak
Last updated 9 months ago
Prerequisites
Before you begin, ensure you have:
Access: Signature modification permissions
Licensing: Email signatures enabled for your account
Logo: Company logo image (PNG/JPG, recommended max 200px height)
Brand Info: Company name, website, and any CTAs
Step 1: Navigate to Signatures Settings
Log into the Inky Dashboard
Click Admin Center on the Top Navigation
Select Email Signatures
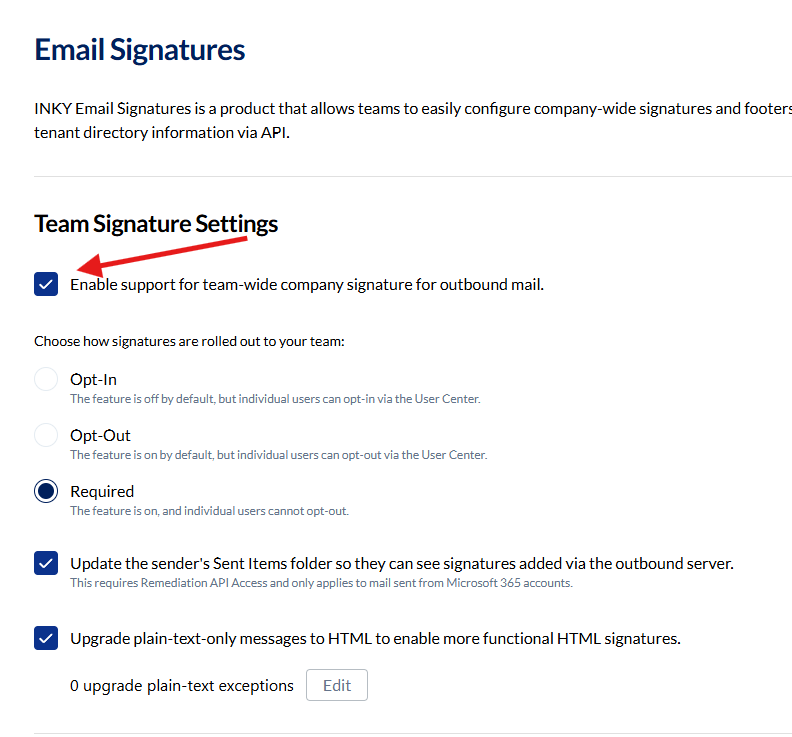
What you'll see: The signatures page shows your current configuration status and a large "Enable support for team-wide company signature for outbound mail." checkbox at the top.
Step 2: Enable Team Signatures
Find the Enable Signatures section at the top of the page
Click the toggle to ON (the top alert component will disappear)
Choose a Deployment Mode:
Required: All users get signatures automatically (recommended for most organizations)
Opt-In: Users choose to enable signatures
Opt-Out: Enabled by default, users can disable
Click Save (appears in the footer)
Result: Team signatures are now enabled! You'll see the configuration tabs appear.
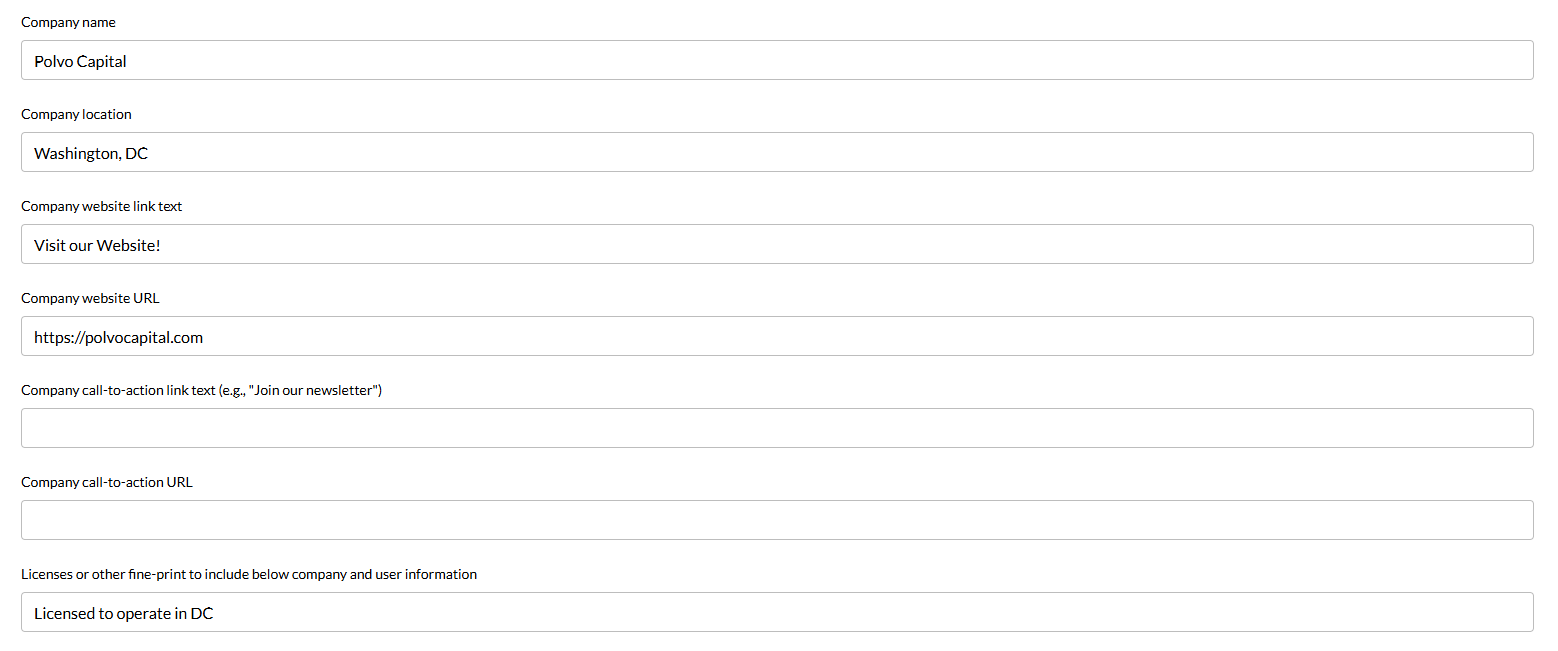
Step 3: Add Company Information
Scroll to Team Signature Data section
Fill in your organization details:
Company Name: Acme Corporation
Company Location: San Francisco, CA
Website Link Text: www.acme.com
Website URL: https://www.acme.com
(Optional) Add a Call-to-Action:
CTA Link Text: Schedule a Demo
CTA URL: https://acme.com/demo
Click Save
Step 4: Upload Your Logo
Click the Images tab
In the Logo Image section:
Toggle Include Logo Image to ON
Click Upload Image
Select your logo file (PNG or JPG)
Choose logo position: Top or Left
Set max height (recommended: 60-80px)
Click Save
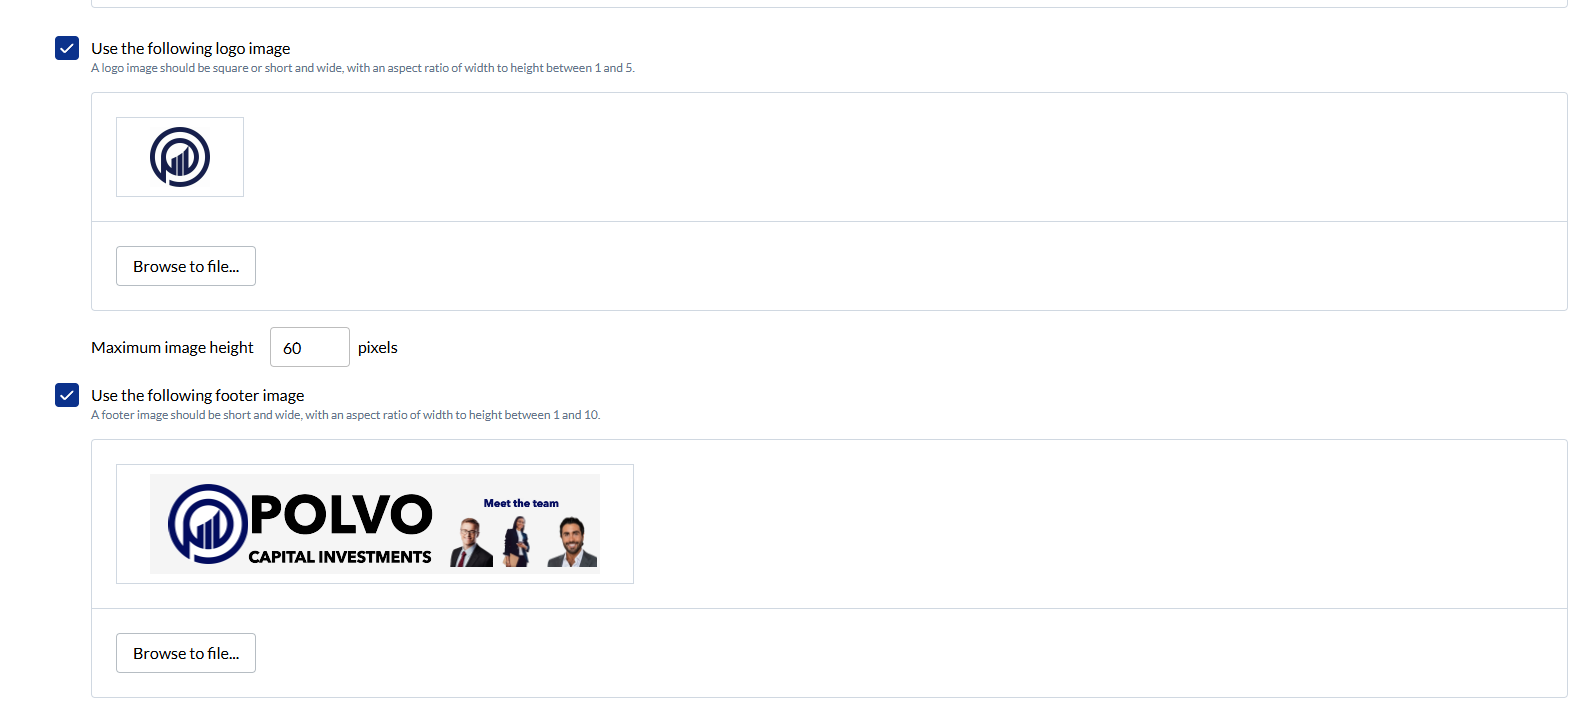
Preview: Click the "Show Preview" button (bottom-right) to see your logo in the signature.
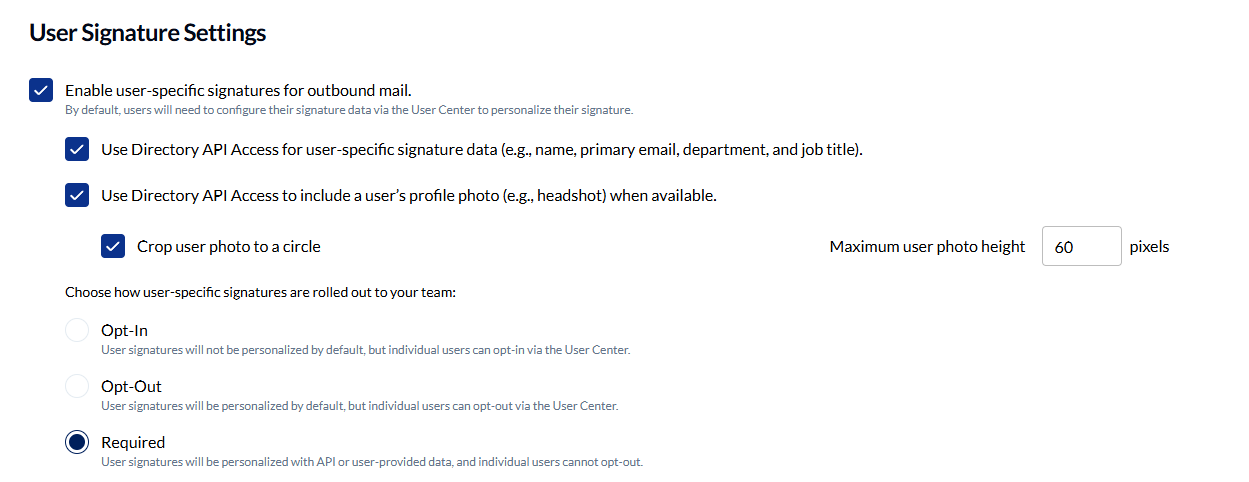
Step 5: Configure User Signature Settings
This section controls how user-specific data appears in email signatures and whether users can customize their own information.
Personalization Options
Enable user-specific signatures for outbound mail to include individual details like names, titles, and departments. By default, users configure their signature data through the INKY User Center.
Use Directory API Access to automatically pull user information (name, email, department, job title) from your Microsoft 365 or Google Workspace directory. This eliminates manual data entry and keeps signatures synchronized with your directory.
Include profile photos from your directory by enabling the "Use Directory API Access to include a user's profile photo" option. You can crop photos to circles for a professional look and set a maximum photo height in pixels to maintain consistent formatting.
Rollout Strategy
Choose how signatures are deployed to your team:
Opt-In: Signatures start unpersonalized. Users must enable personalization through the User Center. Use this for organizations where signatures are optional or you want gradual adoption.
Opt-Out: Signatures are personalized automatically for everyone. Users can disable their personalized signature if they prefer. This is the recommended approach for most organizations.
Required: Signatures are personalized and mandatory. Users cannot opt out. Choose this when organizational policy requires consistent, branded signatures for all outbound email.
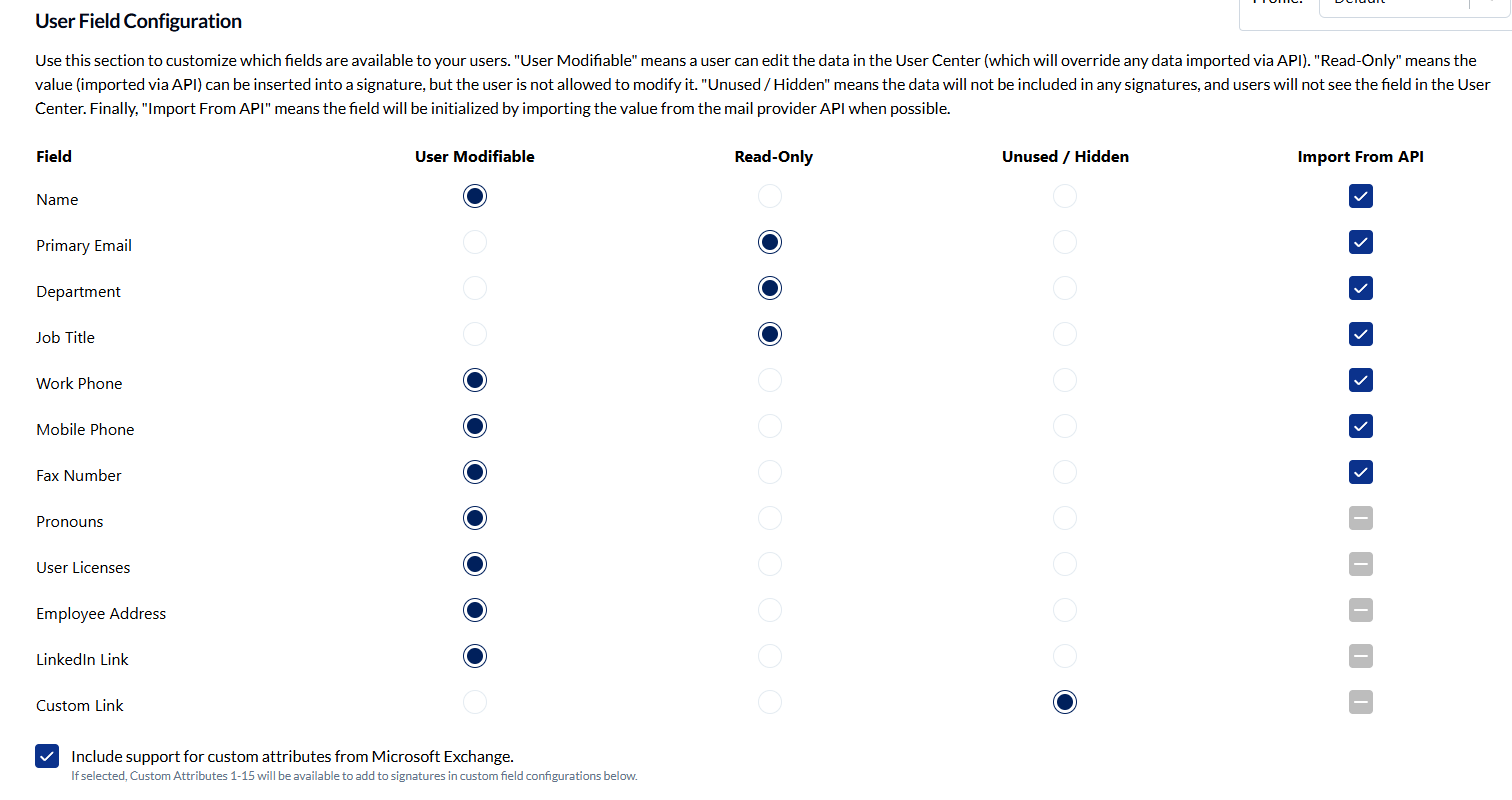
User Field Configuration
Control which fields are available and how users interact with them. Each field can be set to:
User Modifiable: Users can edit this field in the User Center, overriding any API-imported data
Read-Only: Field is populated from your directory API, but users cannot change it
Unused / Hidden: Field is not available for signatures and hidden from the User Center
Import From API: Automatically populate the field from your mail provider when available
Available fields include Name, Primary Email, Department, Job Title, Work Phone, Mobile Phone, Fax Number, Pronouns, User Licenses, Employee Address, LinkedIn Link, and Custom Link.
Microsoft Exchange Custom Attributes: Enable this option to access Custom Attributes 1-15 from your Exchange directory. This allows you to include organization-specific directory fields in signatures.
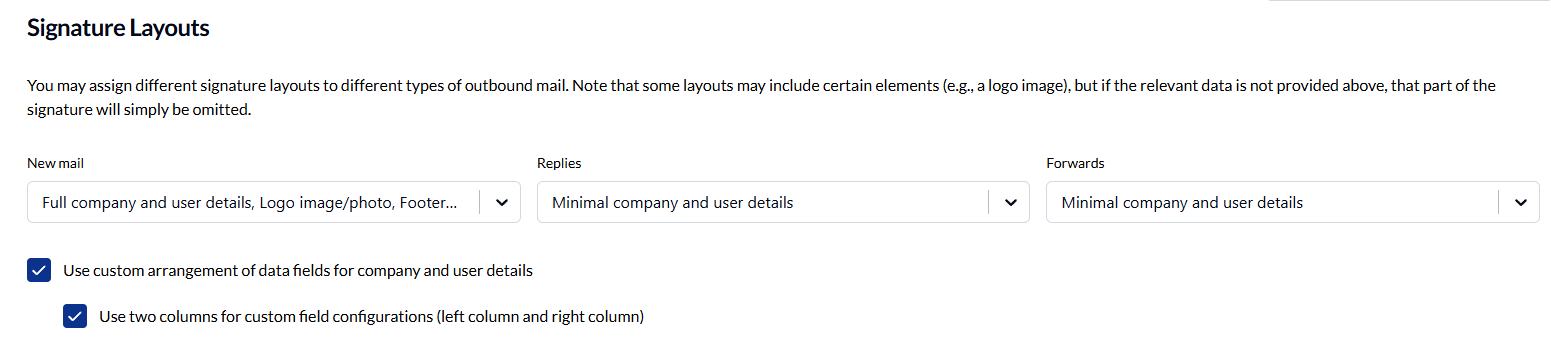
Step 6: Configure Layout
Layout Types
New mail: Shows the full signature with complete company and user details, logo image, profile photo, footer image, and footer text. This is your primary signature for first-contact emails.
Replies: Uses minimal company and user details. Replies typically don't need full branding since the recipient already has your complete information from the original email.
Forwards: Also uses minimal details for the same reason as replies.
If a layout includes certain elements (like a logo image or profile photo) but the data wasn't provided in earlier configuration steps, that element is simply omitted from the signature.
Custom Field Arrangements
Use custom arrangement of data fields to control exactly which fields appear in your signatures and how they're organized. You can build separate field configurations for "Full company and user details" (new mail) and "Minimal company and user details" (replies/forwards).
Two-column layout: Enable "Use two columns for custom field configurations" to split signature information into left and right columns. This creates a professional, space-efficient layout. You can align each column independently (left or right alignment).
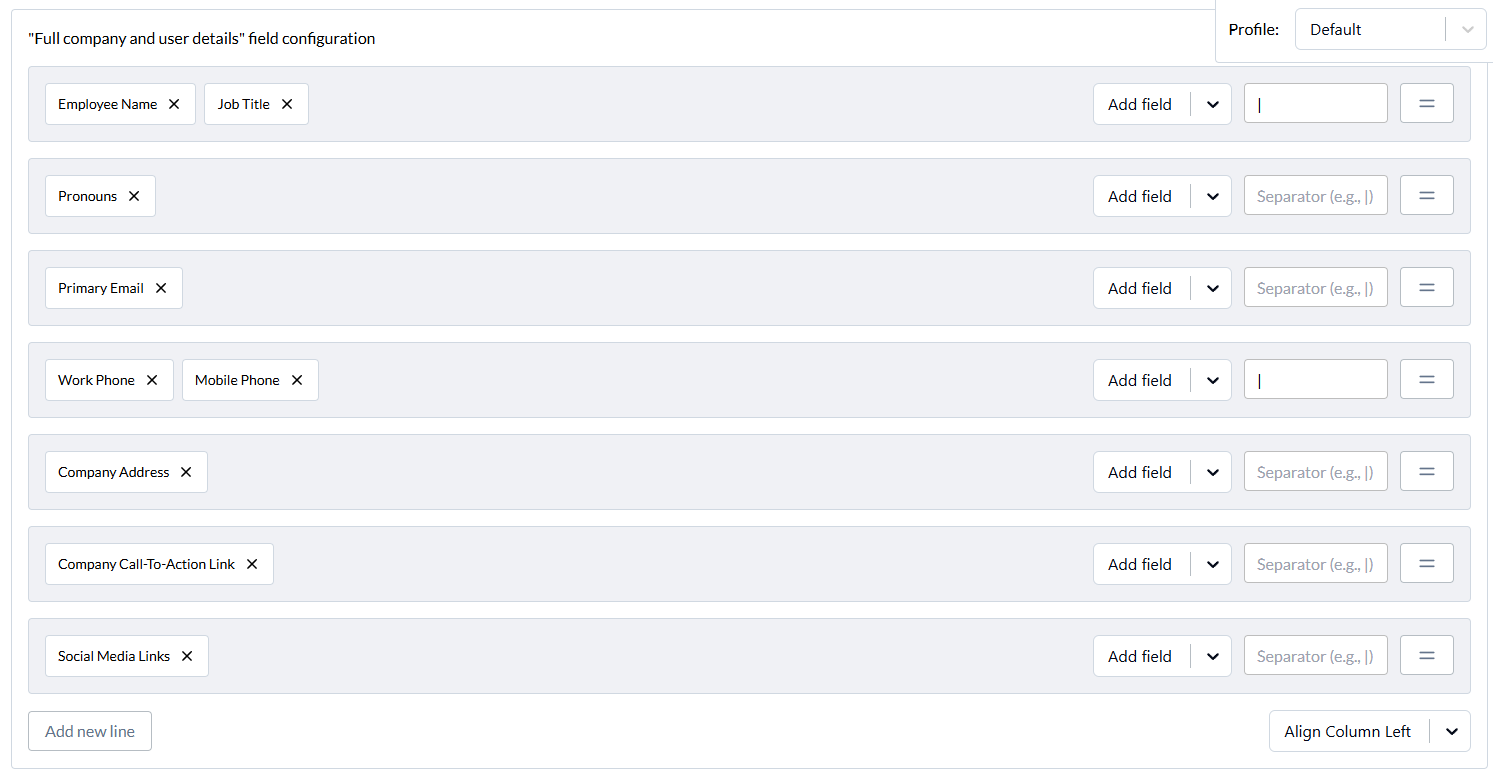
Building Field Configurations
Add fields to each configuration using the "Add field" button. Common fields include:
Employee Name, Job Title, Pronouns
Primary Email, Work Phone, Mobile Phone
Employee Address, Company Address
LinkedIn Link, Custom Links
Social Media Links, Call-to-Action Link
User-Specific Licenses
Use "Add new line" to create line breaks between fields for better readability.
Important Notes
Unused fields appear in red: If you marked a field as "Unused/Hidden" in the User Field Configuration section but previously added it to a layout, it displays in red and won't appear in the actual signature. Remove these fields or change their configuration status.
Address override behavior: By default, if a user sets a "Company Address Override" in their User Center, it replaces the admin-specified "Company Address" field. However, if you use the "Employee Address" field in your custom configuration, both address fields appear exactly as specified with no automatic override logic.
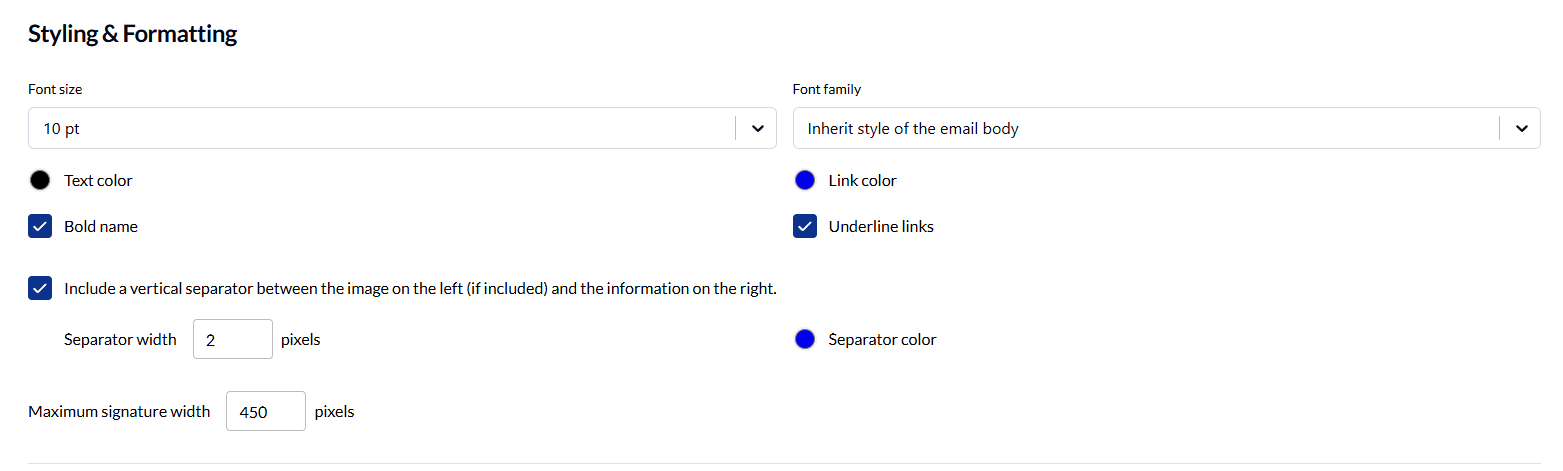
Step 7: Customize Styling
Navigate to the Styling & Formatting section
Set your brand colors:
Font Family: Arial (or your brand font)
Font Size: 12px
Text Color: #333333
Link Color: #0066CC
Configure options:
✅ Bold Name
✅ Underline Links
Step 8: Preview Your Signature
Scroll to the bottom of the page for “Preview Signature”
Check “Display places…” and “Display user-specific…”
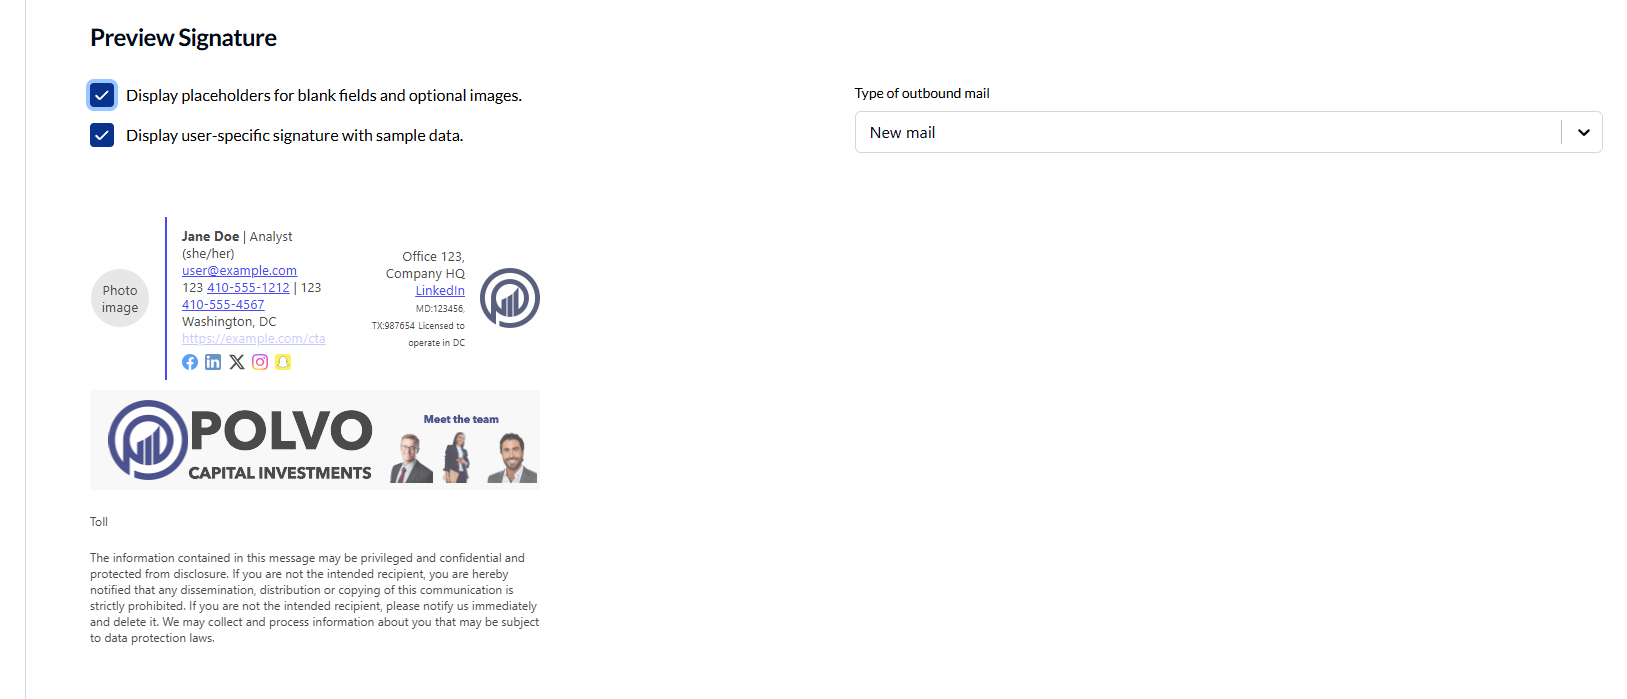
Testing: The preview shows sample data. Your actual signature will use real user information from your directory.
Step 9: Save & Deploy
Review your signature in the preview
Make any final adjustments
Click Save Changes in the footer
Your signatures are now live! 🎉
What Happens Next?
For Users
Depending on your deployment mode:
Required: Signatures appear immediately on all outgoing emails
Opt-In: Users see a prompt to enable signatures in their email client
Opt-Out: Signatures are active; users can disable in settings if desired
Common First-Time Issues
Logo Not Showing
Check: File size (max 5MB) and format (PNG/JPG preferred)
Fix: Resize image to under 200px height before uploading
Preview Not Updating
Check: Changes are saved (click Save button)
Fix: Close and reopen preview panel to force refresh
Signature Too Wide
Check: Max Width setting (Styling tab)
Fix: Set to 600px or less for better email client compatibility
Missing User Data
Check: Directory integration is configured
Fix: Contact your account administrator or INKY Support to verify directory sync
Quick Reference: First Signature Checklist
Copy this checklist for your first signature:
□ Enable team signatures
□ Choose deployment mode (Required/Opt-In/Opt-Out)
□ Add company name and location
□ Add website URL
□ Upload logo image
□ Set logo position and size
□ Configure basic layout (Name, Title, Email, Phone)
□ Choose field separators
□ Set font and colors
□ Preview signature
□ Save changes
□ Monitor deployment stats
Time to Complete: 10-15 minutes
Need Help? Check the Troubleshooting Guide or contact Inky Support at support@inky.com.