Adjust Billable Users in Microsoft 365
Learn how to control which users are counted for billing in Microsoft 365 using Include and Exclude groups.
Written By Matt Sywulak
Last updated 5 months ago
In Microsoft 365 environments, INKY creates three groups during installation to control user protection and billing: Include, Exclude, and Journal. You can manage group membership directly from the INKY Dashboard.
Understanding the Groups
Include
Purpose: Users in this group are protected by INKY
Billing Impact: Counted toward bill (except shared mailboxes)
Exclude
Purpose: Users in this group are removed from protection
Billing Impact: Not counted
Journal
Purpose: User receiving journal copies of emails for initial analysis
Billing Impact: Not currently billed but will be looked at in the future.
How billing is calculated: Include group members minus Exclude group members = Billed users. The user must be in both the Include and Exclude group for the delta to count.
Managing Groups in the INKY Dashboard
The easiest way to manage group membership is through the INKY Dashboard:
Go to Admin Center → Tenant Operations → Group Management
Use the table to view all users and their current group assignments
Filter by Status (Active/Inactive), Type (User/Shared), or Groups
Search for specific users by name or email
Add users to groups using the "Add to Group" dropdown
Remove users from groups by clicking the X on the group badge
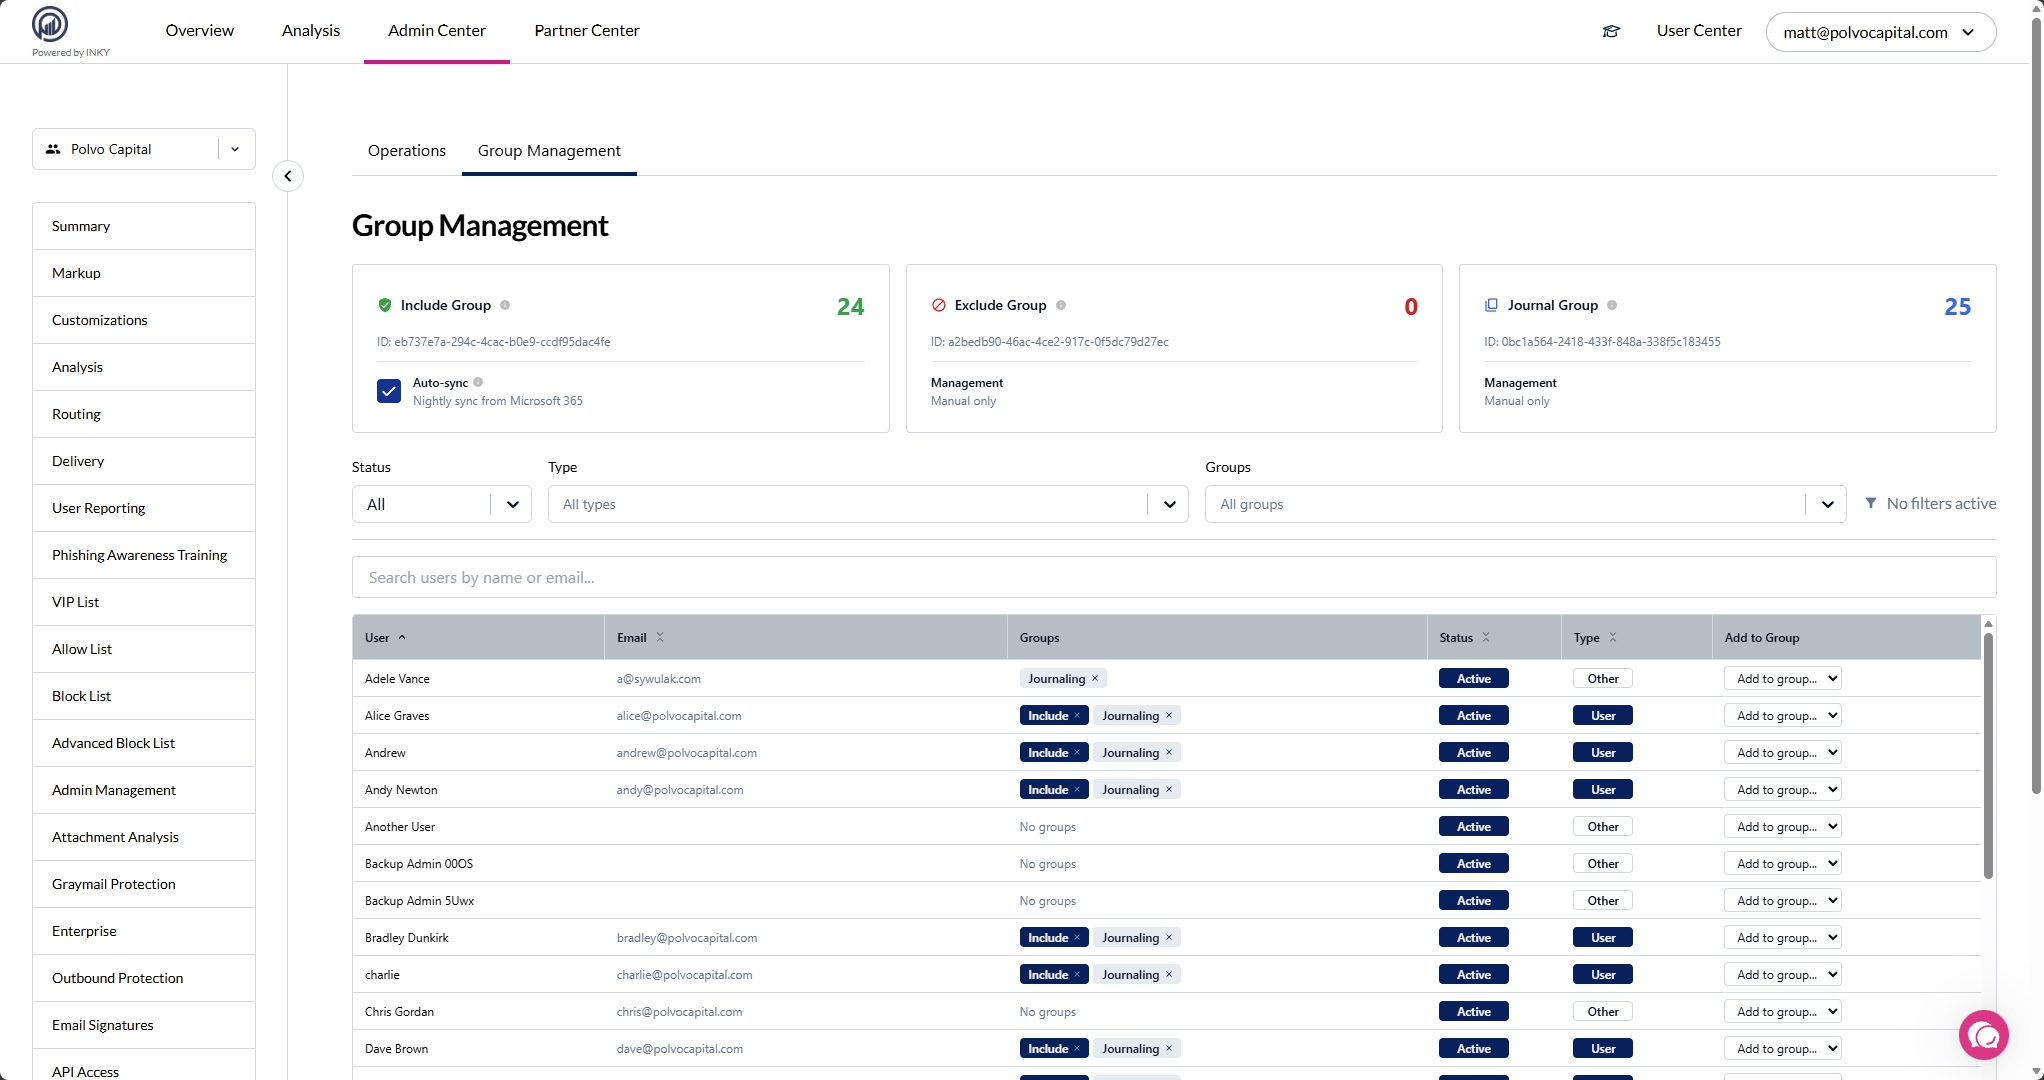
Add a User to a Group
Find the user in the table (use search or filters)
In the "Add to Group" column, select the group from the dropdown
The user is immediately added to the group
Remove a User from a Group
Find the user in the table
Click the X on the group badge you want to remove
The user is immediately removed from the group
Common Scenarios
Protect a New User
Add them to the Include group. They'll be protected and billed starting the next day.
Stop Protecting a User
Either remove them from the Include group or add them to the Exclude group. They'll stop being protected and billed.
Exclude Service Accounts
Add service accounts to the Exclude group to prevent unnecessary billing while keeping them in your Include group for organizational purposes.
Shared Mailboxes: Protected but Not Billed
INKY automatically protects shared mailboxes but does not count them toward your bill. This means:
Included Users count may include shared mailboxes
Billed Users count excludes shared mailboxes
Your group membership count may be higher than your billed user count
Example: Your Include group has 110 members (100 user mailboxes + 10 shared mailboxes). INKY protects all 110 mailboxes, but you're only billed for 100 users.
You do not need to add shared mailboxes to an Exclude group—they're automatically excluded from billing while still receiving protection.
Important Notes
Timing: Changes to groups are recorded overnight. Make changes at least one day before billing snapshots.
Nested groups: INKY evaluates direct group membership only. Nested groups inside the Include group are not supported—members of nested groups will not be counted or protected. You must add users directly to the Include group.
Auto-sync: If auto-sync is enabled for the Include group, you cannot manually remove users from it.
Verify Your Configuration
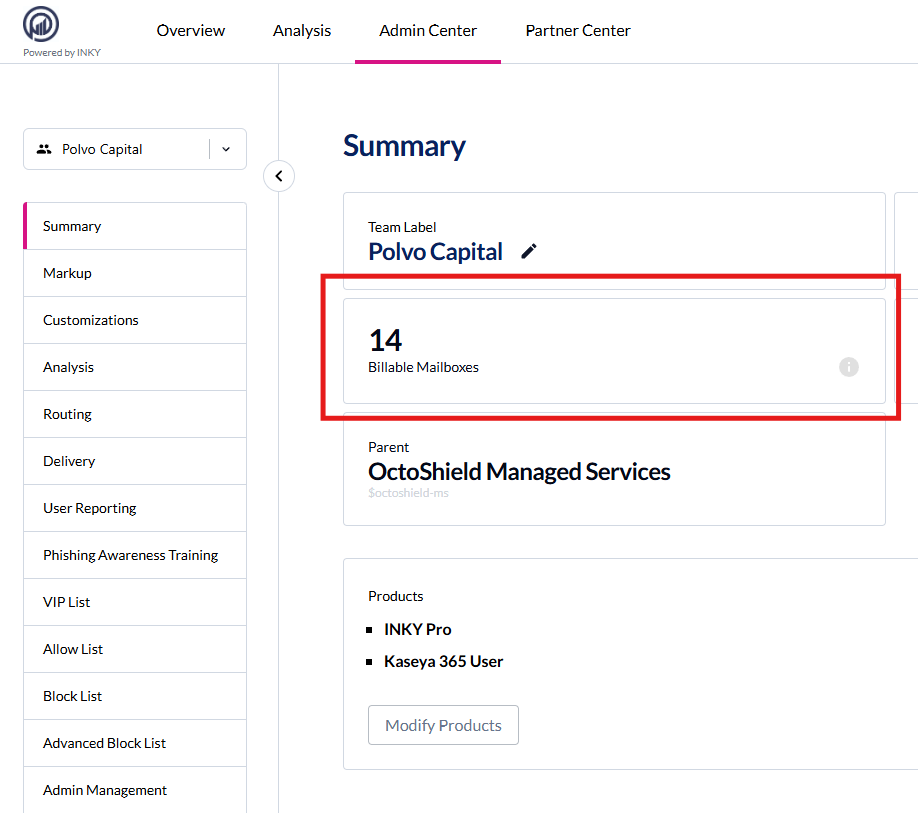
After making changes, verify the user count in the INKY Dashboard:
Wait until the next day for changes to take effect
Go to Dashboard → Overview
Check the Protected Users count
Compare against your expected count (remember shared mailboxes are protected but not billed)
Related: Understanding INKY Billing