Using the Threat Center Page
Written By Matt Sywulak
Last updated 9 days ago
The Threat Center page is your central workspace for reviewing and acting on email that needs attention. It's organized into tabs, each showing a live count in the tab bar so you can jump straight to the queue that needs work. Use the team selector and date range selector in the top-right to scope the view; a specific team must be selected.
Threat Center was previously called Triage. The name changed in the v1.9.5 dashboard release; the tabs and everything behind them are unchanged.
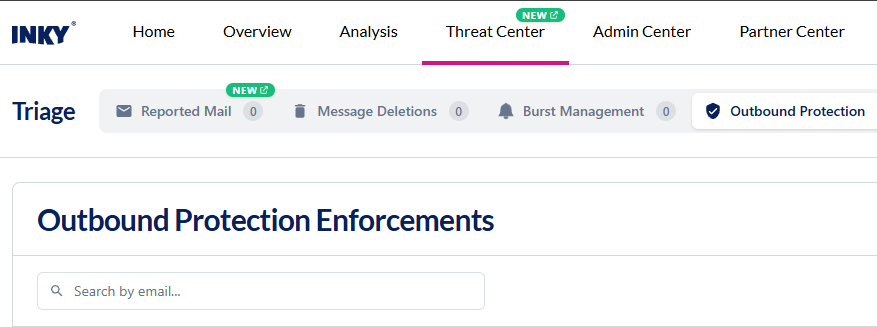
The Threat Center tabs
Depending on what your team has enabled, Threat Center can show these tabs:
Reported Mail — emails your users reported, grouped by message so you can act on a whole group at once. See Reported Mail.
Message Deletions — in-flight message deletion and remediation requests, with their status.
Burst Management — users currently in inbound or outbound burst mode, and users you've prevented from entering burst mode.
Outbound Protection — Account Takeover (ATO) enforcements, described in detail below. Requires the outbound protection entitlement.
Cases — group related messages into cases and act on them together. (Beta)
A tab appears only when the matching feature or entitlement is enabled for your team, so you may see a subset of the tabs above. Tabs that are still rolling out carry an INTERNAL or BETA badge, which disappears once the feature is generally available.
Take Action
Acting on a message is called Take Action everywhere except where the action is specifically a deletion or a quarantine release. The Take Action dialog offers the allow-list, block-list, and policy options that apply to the messages you selected, merged and de-duplicated across the selection, then shows a results screen when it finishes.
Burst Management
The Burst Management tab summarizes burst activity with four stats — Active Inbound, Active Outbound, Prevented Inbound, and Prevented Outbound — and lists the affected users in two tables: Active bursts and Prevented users ("These users are blocked from entering burst mode."). Outbound stats appear only if your team is entitled to outbound protection.
Outbound Protection (Account Takeover enforcements)
The Outbound Protection tab is the view for monitoring and managing all active and historical Account Takeover (ATO) enforcements. Its header stat, Active Enforced Users, counts users currently in enforcement mode.
Reading the enforcement list
Each enforcement appears as a row showing:
The user's email address
A threat level badge (High / Medium / Low)
An enforcement status pill: Active (currently in enforcement), Expired (time elapsed without admin action), or Released (manually dismissed by an admin)
The subject line of the triggering message and intended recipients
When enforcement began and how long ago
The time of the most recent message held under enforcement
A message count (total messages held)
Active enforcements are sorted to the top. Expired and released enforcements appear below. Use the search bar to filter by email address and the High / Medium / Low buttons to filter by risk level. All times are shown in your browser's own timezone.
Reviewing an enforcement
Click anywhere on an enforcement row to expand it. The expanded view shows an alert summary banner describing what triggered enforcement (for example, "3 dangerous links, 1 phishing content signal detected across 2 signals"), three stat boxes for how many messages are currently Quarantined, Discarded, and Delivered, and a message table. Each message shows its subject (with any matched workflow rules), recipients, action, date, status, and links to open message details or the Observations page.
Messages that were delivered while the user was under enforcement carry an ATO Delivered status, so you can tell them apart from mail delivered normally.
Approving and rejecting quarantined messages
For messages that are currently quarantined and have not yet been acted on, administrators with Modify permission see Approve and Reject buttons in the message row.
Approve — releases the message for delivery to recipients
Reject — discards the message permanently
Actions take effect immediately. If multiple messages share a group key (part of the same sending batch), processing one will lock the others from simultaneous action until complete.
Releasing a user from enforcement
To end an active enforcement before its Time in Force expires, click the enforcement's status box — the whole box is clickable, not just the shield icon. This opens the Release modal, where you choose how to handle any still-quarantined messages:
Approve Quarantined Messages — releases all held messages for delivery
Reject Quarantined Messages — discards all held messages
Do Nothing with Quarantined Messages — leaves held messages in place (they will be automatically rejected when enforcement ends)
Each option shows how many messages are still quarantined, so you can see what you are acting on before you choose. You can only act on quarantined messages. Once every message has been approved or rejected, the approve and reject options switch off and the dialog says All messages have already been processed. A summary shows what has already been approved or rejected against what is left.
Reject Quarantined Messages warns you before it runs. Rejected messages are discarded permanently and cannot be recovered.
Click Release User to confirm. The user's outbound messages resume normal delivery immediately, and the enforcement row remains visible with a Released status.
Bulk Deletion Limitations:
When a user selects the top checkbox from observations, it only selects everything in the current list, which loads in batches of 100.
Selecting a message that has already been remediated will not allow re-remediation (no trash icon).
Selecting a large number can take some time to process.